DIY Halloween Nail Art: Here Are Five Easy, Spooky Designs With Step-by-Step Instructions
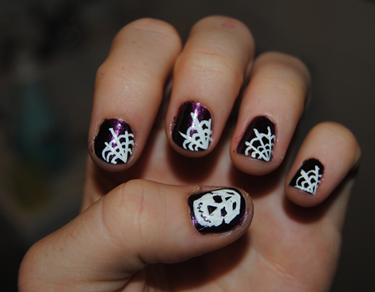
1. Do two solid base coats of your choice color—I chose a shimmery purple since black and white looked a little stark.
2. For the webs: draw two or three diagonal lines from a corner of the nail, spacing them as evenly as possible.
3. Make tiny swoops in between, creating half circles as if the web was draped.
2. For the webs: draw two or three diagonal lines from a corner of the nail, spacing them as evenly as possible.
3. Make tiny swoops in between, creating half circles as if the web was draped.

4. For the skull: Make a half circle outline for the top of the skull and a slightly smaller one for the jaw (not intersecting).
5. In between the two, draw two squares for eyes and a triangle for nose (keep in mind that when you fill in the color around this space, it will look smaller than it did when you drew it. Better to overcompensate than end up with a too-small shape).
6. Fill in the top, leaving sporadic spaces.
7. To do the mouth, draw a “mouth” shape below the nose and fill in the surrounding area. Make small notches from the top and bottom for teeth (this is better than simply drawing lines straight across, which look unrealistic).
ColorsPurple: Zoya Jem
White: Hurricane Thin Brush White
White: Hurricane Thin Brush White
Happy Halloween !!!!!!!!!!!!!!!!!!!!!!!!!!!!!!!!!!!!
No comments:
Post a Comment